
Picture this: you’ve just landed a bulk order from a fast‑fashion brand that demands a new fleece by next month, and the only thing you’ve got is a handful of A4 swatches from a supplier. You’re on a tight deadline, the brand’s margin is razor‑thin, and you can’t afford a misstep. In the next ten minutes, armed with a simple checklist, you can turn those swatches into a crystal‑clear verdict—no guesswork, no costly returns.
Our 10‑minute routine covers everything that matters: weigh a 10 × 10 cm cut to verify GSM, run a hand‑feel test against a trusted reference, pull for stretch recovery, crush for wrinkle resilience, rub to spot color transfer, inspect under natural light for weave evenness, sniff for finishing residues, and even wash at home to gauge shrinkage. Capture each step with a photo, score it on a quick card, and flag any red flags that should halt the order. Over time, assemble your own reference library to make future decisions even faster. Remember, any reputable mill—YITUO included—offers free A4 swatches because they know that confident quality starts with the right sample.
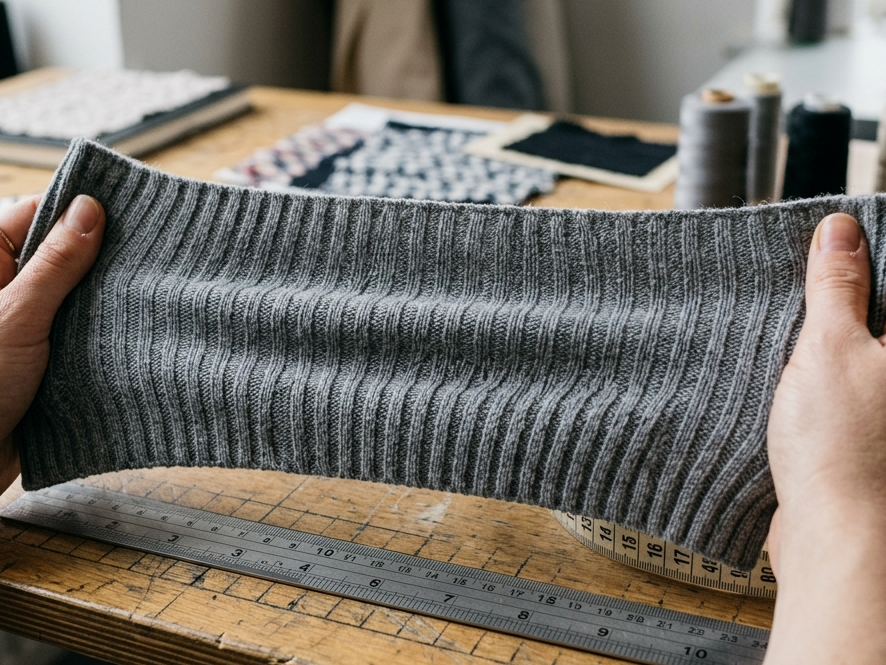
Weigh, Measure, Verify: The 10×10 cm GSM Check
Before you even touch the fabric, the first checkpoint is the weight‑to‑area ratio – the GSM (grams per square metre). A single 10 cm × 10 cm sample gives you a quick, reliable gauge of whether the material matches the spec sheet and whether it will behave as expected in garment construction.
Step 1: Cut a Precise Test Piece
- Use a sharp knife or fabric scissors to trim a clean, square piece of 10 cm × 10 cm. Rounding the corners reduces edge effects during weighing.
- Ensure the sample represents a full weave or knit repeat; avoid cutting near hems or seams.
Step 2: Weigh Accurately
- Place the sample on a digital kitchen scale set to 0.01 g resolution. Weigh the piece to the nearest gram.
- Record the weight. For example, a 6 gsm fleece should read roughly 0.60 g (10 cm × 10 cm = 0.01 m²; 0.01 m² × 6 g/m² = 0.06 g; round‑up to 0.06 g).
Step 3: Calculate the GSM
GSM = (Weight in grams) ÷ (Area in square metres)
Area = 0.10 m × 0.10 m = 0.01 m². If your weight is 0.62 g, the GSM is 62 g/m².
Step 4: Verify Against Specification
- Check the spec sheet or production order. Allowed tolerance is usually ±5 % for most fabrics.
- For a 50 g/m² spec, any reading between 47.5 g/m² and 52.5 g/m² passes. A reading of 55 g/m² signals a potential over‑weight batch that may affect garment fit or cost.
- Log the result in your scorecard: GSM: 52 g/m² – Pass.
Step 5: Cross‑Check with Alternative Units
- Convert to ounces per square yard (oz/yd²) if you’ll be collaborating with European buyers. 1 g/m² ≈ 0.002283 oz/yd². Thus, 50 g/m² ≈ 0.114 oz/yd².
- Use this conversion to confirm bulk pricing calculations – a 10 % increase in GSM can add about 8 % to material cost.
Step 6: Document and Repeat
- Take a photo of the sample, scale, and the weighing interface. Annotate the photo with the measured weight, calculated GSM, and spec tolerance.
- Repeat the process for at least three independent samples from the same lot to account for batch variability. A consistent spread within ±3 % strengthens confidence.
By locking down the GSM early, you protect against downstream surprises—shrinkage, drape, and cost overruns. A mill like YITUO guarantees that every A4 swatch aligns with its spec sheet, so if your 10 cm × 10 cm test falls outside the tolerance window, flag the order immediately. This first line of defense keeps the rest of the evaluation smooth and reliable.
Handfeel Checkpoint: Soft, Harsh, Papery—Set a Reference
After you’ve weighed and measured your 10 × 10 cm swatch, it’s time to judge the tactile quality. Handfeel is the first clue to how the fabric will translate into a finished garment: comfort, perceived value, and even construction decisions hinge on it.
Establishing a Baseline
Before you start testing, pull a reference sample from a reliable batch—ideally a fabric from a previous order that met all technical specs and customer approval. Keep this reference in a separate folder labeled “Reference Swatch.”
Use the reference to create a quick scoring rubric that you’ll apply to every new sample:
- Softness (0‑10) – Rate how pliable the surface feels. A score of 0 means rigid or stiff; 10 means buttery smooth.
- Harshness (0‑10) – Capture any rough spots, burrs, or uneven yarn play. 0 indicates no irritation; 10 indicates a harsh, uncomfortable feel.
- Papery/Thin (0‑10) – Evaluate the absence of bulk. 0 means heavy and dense; 10 means a lightweight, paper‑like texture.
Record these numbers in a simple table for each sample. The comparison to your reference will immediately flag deviations.
Practical Testing Steps
- Feel the Full Surface – Hold the swatch under your fingertips and gently spread it. Notice any resistance when you glide your hand across the weave.
- Pull and Release – Pull the fabric taut along its longest axis, then release. Observe how it returns to its original shape; a “soft” fabric should feel elastic, whereas a “harsh” one may snap back.
- Edge Check – Inspect the raw edge. A high‑quality knit should have a clean, fine edge without frayed or loose yarns; a “papery” fabric may show a thin, uneven edge.
- Comparative Touch – Place the test swatch next to the reference side‑by‑side. Use a ruler to align them; feel each side under the same pressure.
Quantifying the Result
Once you’ve scored each dimension, compute a composite handfeel score:
Composite Score = (Softness + (10 – Harshness) + (10 – Papery)) ÷ 3
Use thresholds to decide on next steps:
- ≥ 8.5 – Pass. Fabric meets or exceeds reference comfort.
- 6‑8.5 – Pass with Note. Minor softness or roughness; document and discuss with the mill.
- ≤ 6 – Red Flag. Request a new sample or rework.
Documenting and Storing Findings
Attach a photo of the swatch touched against the reference. In your scorecard, include:
- Sample ID and lot number
- Date of evaluation
- Softness, Harshness, Papery scores
- Composite score
- Notes on any visible defects (e.g., uneven yarn pull, micro‑holes)
Adding this objective metric to your reference swatch library allows you to track trends over time—whether a particular loom or yarn supplier consistently produces softer or harsher fabrics, and how finishing processes affect handfeel.
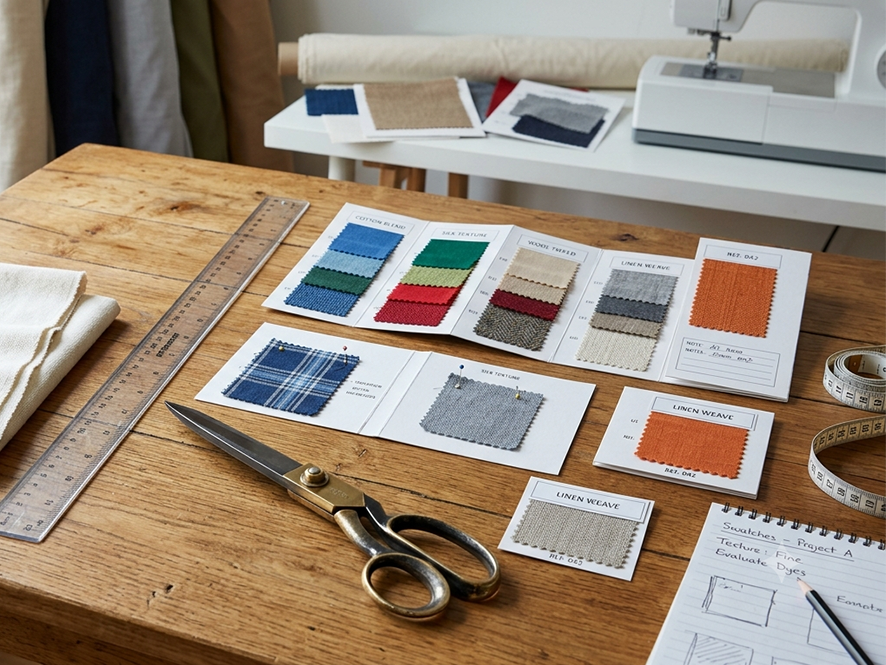
Stretch & Recovery Test: Pull, Measure, Score
Once you’ve weighed and hand‑felt the 10 × 10 cm sample, the next key indicator of functional performance is how the fabric behaves under tension. Stretch and recovery give you a quick glimpse into yarn integrity, weave integrity, and finish durability. In a ten‑minute window you should be able to quantify both the maximum elongation and the percentage of loss after release.
Step 1: Prepare the Sample
- Trim a clean 10 × 10 cm square from the center of the swatch, avoiding any slubs or printed motifs that could bias the test.
- Secure both ends of the sample to a ruler or a small, calibrated force gauge. A simple carpenter’s square or a cheap digital force meter (±5 g accuracy) works well.
- Mark the mid‑line of the sample with a pencil to measure the exact distance between the grips.
Step 2: Apply Tension and Record Elongation
- Gently pull the fabric until it reaches a maximum of 10 cm of elongation from the original 10 cm length. Note the load in grams (typical fabrics finish between 300–800 g for light fleece, 800–1200 g for mid‑weight knit).
- Use a ruler to measure the new length: Original length (10 cm) + elongation (10 cm) = 20 cm.
- Calculate the percent stretch as:
Percent Stretch = (Elongation ÷ Original Length) × 100 % = (10 cm ÷ 10 cm) × 100 % = 100 %
- Record the load, stretch percentage, and any visible changes in texture or color.
Step 3: Release and Measure Recovery
- Release the tension and allow the fabric to settle for 30 seconds. This pause prevents the yarns from staying under load and gives you a realistic recovery figure.
- Measure the recovered length with the ruler. For a good recovery you should end up within 1 cm of the original 10 cm (i.e., ≤ 9 cm recovered).
- Calculate the recovery rate:
Recovery Rate = (Recovered Length ÷ Original Length) × 100 % = (Recovered Length ÷ 10 cm) × 100 %
- Score the fabric on a 1‑5 scale:
- 5 = > 99 % recovery, minimal creasing
- 4 = 95‑98 % recovery, slight crease
- 3 = 90‑94 % recovery, moderate crease
- 2 = 85‑89 % recovery, heavy crease
- 1 = < 85 % recovery, unacceptable
Step 4: Document and Compare
Capture a photo of the sample in its relaxed state and annotate the stretch and recovery figures. Add these numbers to your simple scorecard next to other metrics (GSM, handfeel, crush). If the recovery score falls below 3, flag the swatch as a potential risk for wrinkle‑prone garments or high‑wear areas. At the same time, note the load at maximum stretch: a very high load may indicate a stiff, non‑stretchy knit that isn’t suitable for activewear.
By following this routine, you’ll quickly spot fabrics that either over‑stretch and lose shape or that resist stretching and may feel rigid in the finished garment. In the fast‑paced B2B environment, this single test delivers a reliable, repeatable indicator of production‑quality performance.
Crush & Wrinkle Recovery: 30‑Second Crumple Analysis
When a garment will be handled, folded, or stored, the fabric’s ability to return to its original shape matters as much as its aesthetic appeal. A 30‑second crush test is a quick, repeatable way to gauge that resilience. Follow this routine to capture objective data that will help you decide if a material is fit for business.
Step 1 – Prepare the Sample
- Cut a clean 10 × 10 cm square from the swatch, keeping the edges free of folds.
- Mark the center point with a small pin or a permanent marker—this will be the reference for measurement.
- Place the square on a flat, non‑absorbent surface (glass or tile). The background should be neutral to avoid optical illusion.
Step 2 – Apply the Crush
- Using a ruler or a standard 30 mm thick weighted object (e.g., a block of wood or a calibrated mass), press down on the middle of the sample for exactly 30 seconds.
- Ensure the pressure is uniform; a fingertip can be used if the ruler is not available, but a calibrated weight gives the most reproducible results.
- Remove the weight and let the sample sit for another 30 seconds before measuring. This pause allows any temporary deformation to dissipate.
Step 3 – Measure the Recovery
Recovery is expressed as the percentage of the original height restored after the crush. Height is the distance from the base to the top of the sample’s creased area.
- Use a digital caliper or a precision ruler to measure the height at the center point immediately after crushing.
- Measure again after the 30‑second rest period.
- Calculate recovery with the formula:
Recovery % = [(Restored Height – Crushed Height) ÷ Restored Height] × 100
For example, if the sample was 12 mm high before crushing, 4 mm when crushed, and 10 mm after the rest, recovery is ((10–4)/10) × 100 = 60 %.
Step 4 – Interpret the Results
- ≥ 80 % recovery – Good resilience; suitable for high‑turnover retail or garments that undergo frequent folding.
- 60 – 79 % recovery – Acceptable for casual wear or accessories; watch for noticeable creases after laundering.
- ≤ 59 % recovery – Low resilience; consider for specialty items or as a baseline for further finishing treatment.
Step 5 – Document & Score
Record the following in your scorecard:
- Material type and GSM (e.g., 200 gsm polyester)
- Crush height (mm)
- Recovery height (mm)
- Recovery %
- Photograph of the sample before crushing, during crushing, and after recovery
Assign a score of 1–5, where 5 equals ≥ 90 % recovery, 3 equals 70–79 %, and 1 equals ≤ 59 %. Keep a running log to spot trends across suppliers or within a single mill’s production lots.
Red Flags to Watch For
- Recovery below 60 % with a high GSM (> 250 gsm) – indicates improper yarn tension or finish.
- Visible permanent creases (scratches or indentations) that persist after the 30‑second rest.
- Crushed height exceeding 25 % of the original height (e.g., 30 mm crush on a 100 mm sample) – suggests a weak weave or unbalanced yarn count.

Color Transfer Rub: Dry & Wet White Cloth Checks
When you’re in a rush, a quick color transfer test can flag finishing problems that might cost you in returns or brand damage. Grab a clean, bright‑white cotton or polyester cloth—nothing more than a 30 × 30 cm square—and follow this step‑by‑step routine.
Dry Rub Procedure
- Preparation. Lay the white cloth flat on a hard surface. Place the fabric sample in the center and apply firm pressure with the palm of your hand for exactly 10 seconds.
- Inspection. Lift the sample and examine the white cloth under natural light. Look for any visible pigment traces—tiny flecks, smudges, or a faint tint. A high‑quality finish should leave no perceptible marks or a maximum of 1 mm uniform, light‑colored streaks that blend into the base color.
- Documentation. Photograph the result with a ruler in frame. Note the sample number, the fabric weave (e.g., 200 D polyester knit), and the test date.
Wet Rub Procedure
- Moistening. Dampen the white cloth with a spray bottle filled with tap water. The cloth should be damp but not dripping; aim for a wetness level of 30 % ± 5 % relative to its dry weight.
- Rub. Lay the sample on the damp cloth and repeat the 10‑second pressure. The moisture helps reveal any soluble dyes or finishing agents that might be leaching.
- Inspection. Wipe the cloth in a single direction and inspect for color transfer spots. Any spot larger than 2 mm in diameter or a noticeable change in the cloth’s whiteness is a red flag.
- Record. Capture a photo of the wet‑rub result. Include a scale bar for reference.
Interpreting Results
- No visible transfer. Sample passes the color transfer test; proceed to the next step.
- Subtle, uniform tint. Acceptable if the tint is ≤ 0.5 % of the sample’s surface area and blendable in the final garment. Document the tolerance and discuss with the mill if necessary.
- Discrete spots or streaks. Immediate flag. Compare against the mill’s pre‑approved finish specifications—most mills list 0 % color transfer as a benchmark. If the sample exceeds this, request a re‑finished batch or a detailed breakdown of finishing chemicals used.
- Large or multiple spots. Reject the sample. Even if the GSM and handfeel are acceptable, high color transfer indicates potential dye runoff during washing, which translates into customer complaints and returns.
Time & Cost Considerations
Each dry or wet rub lasts under 30 seconds. For a typical order of 20 samples, the total rub time is less than 10 minutes. The only consumables are the white cloths and a spray bottle—under $5 per set if you reuse the cloths for multiple batches.
Integrating this rub into your 10‑minute evaluation routine guarantees that finishing quality is verified without sacrificing speed. It protects your brand’s reputation and ensures that only fabrics meeting strict color stability standards move forward in the supply chain.
Light & Pattern Audit: Window Test for Weave Evenness
Quick visual inspection is often the first clue that a fabric’s structural integrity may be compromised. By holding a 10 × 10 cm swatch up to a bright window you can immediately spot variations that would otherwise be invisible at desk light. This test is especially critical for jacquard, lace, and woven grades where pattern fidelity is paramount.
Set‑Up: The Right Window & Angle
Choose a window with strong, diffused daylight—no direct sun or glare. Position the swatch about 30 cm from the glass and face it perpendicular to the light source. If you’re working late, use a desk lamp with a neutral‑white filter (2700‑3500 K) to simulate daylight.
What to Look For
- Pattern Consistency – Every repeat unit should align precisely. Misaligned knots or displaced motifs indicate weave defects or machine misalignment during production.
- Color Uniformity – In dye‑bonded fabrics, check for subtle hue shifts across the pattern repeat. A 2‑3 % color variance is usually acceptable, but anything above that may signify uneven dye uptake or finish.
- Thin or Warped Spots – A transparent or lighter patch suggests a thinner yarn or a missed weave. Measure the area; if it exceeds 5 % of the swatch surface, flag it.
- Irregular Thread Tension – Uneven texture or fuzziness often originates from inconsistent loom tension. Look for threads that appear looser or tighter by at least 10 % compared to the adjacent area.
Quantitative Quick Checks
- Pattern Repeat Size – For jacquard, measure the repeat in mil. It should match the specification within ±0.5 mil. A deviation larger than that signals a loom calibration issue.
- Weave Density – Estimate threads per inch (TPI) visually. For a satin weave at 200 gsm, the TPI should be roughly 35‑40. A drop below 30 suggests a loose weave, while above 45 may indicate a tighter stitch that could affect drape.
- Edge Sharpness – Sharp, clean edges imply proper cutting and finishing. Blurry edges may point to post‑cut abrasion or an unclean finishing process that could reduce lifespan.
Speed‑Optimized Scoring
Keep a 3‑point scale for each criterion: 3 = excellent, 2 = acceptable, 1 = red flag. Assign the score in a quick table on a paper scorecard as you observe.
When to Stop
If any of the following is present, consider stopping the order immediately:
- Pattern repeat mismatch > ±0.5 mil
- Color variance > 3 %
- Thin spot > 5 % of swatch area
- Weave density outside 30‑45 TPI range for satin
- Visible thread tension irregularities causing visible puckering or slack
Document each finding with a photo taken from the same angle you used for inspection. These images become part of your reference swatch library and help track quality trends across suppliers.
Smell, Wash, Shrink: Final Home‑Wash Inspection and Red‑Flag Checklist
After the on‑hand tests, the last step is a quick home‑wash to mimic real‑world use. Grab a small 10×10 cm swatch, and follow this 10‑minute routine:
1. Pre‑wash Conditions
- Use a standard 20 oz (707 mL) load of cold water (≤15 °C). No additives.
- Spin at 800 rpm for 30 s, then air‑dry on a flat surface.
- Record initial dimensions with a ruler (mm) and weight (g). For a 12 gsm wool blend, this should read 12 g; any deviation >0.5 g indicates excess moisture retention.
2. Visual & Texture Check
After the wash, inspect for:
- Color change: Measure L*a*b* values using a handheld colorimeter; any shift >3 ΔE is a red flag.
- Surface integrity: Look for fuzz, pilling, or loss of luster. >5 mm of pilling on a 3 oz (102 g) polyester indicates poor finish quality.
- Warp or distortion: Length changes >1.5 % or width >2 % from pre‑wash measurements are unacceptable for high‑detail jacquards.
3. Shrinkage & Recovery
Measure the swatch’s length and width again. Calculate shrinkage percentage:
- Length shrinkage = ((L₀ – L₁)/L₀) × 100
- Width shrinkage = ((W₀ – W₁)/W₀) × 100
For most woven cotton, length shrinkage <4 % and width <2 % are acceptable. Anything higher warrants a deeper look at the yarn count or warp tension.
4. Smell Test
Post‑wash, hold the swatch to your nose. A sharp, chemical odor (acetonitrile, formaldehyde, or solvent fumes) signals inadequate finishing. A faint, neutral scent is expected; anything else triggers a supplier inquiry.
5. Red‑Flag Checklist
- Color shift ΔE >3
- Surface pilling >5 mm
- Length shrinkage >4 %
- Width shrinkage >2 %
- Noticeable chemical odor
- Loss of structural integrity (e.g., loose weave, broken yarns)
- Unexplained weight gain >0.5 g (possible moisture absorption)
When any red flag appears, skip the order and request a new reference swatch. A rigorous home‑wash routine saves time and costs—24 h of washing equals roughly $0.10 per 10×10 cm swatch in labor and consumables, but the risk of a faulty batch is far greater.
Conclusion: Your 10‑Minute Fabric Vetting Toolkit
By treating a swatch like a quick diagnostic test, you can spot the good, the good‑natured, and the red‑flag product in just a few minutes. Start with a 10×10 cm cut, weigh it, and compare GSM to the spec sheet. Feel it against a reference to gauge softness or papery roughness, then pull and release 10 cm to watch for stretch and recovery. Crumple it for the crush test, rub the surface for colorfastness, and hold it to a bright window to sniff out weave unevenness. Finally, give it a quick home wash and check for shrinkage or surface change. Capture every step with photos and jot a score on a simple card—your own micro‑audit trail.
Red flags are clear: a GSM that drifts, a rough or uneven hand, significant stretch loss, or color transfer with a single rub should halt the order. Over time, build a reference library of trusted swatches so you can compare new samples against a proven baseline. Remember, a serious mill—like Yituo Fabric, with 20 years of manufacturing experience—knows that confident quality starts with a free A4 swatch. Reach out today to request your free samples and enjoy our 24‑hour reply guarantee.