
When a boutique in Seoul decided to launch a limited‑run collection of lightweight fleece joggers, they discovered the frustrating reality: a crisp, photogenic design on the fabric’s surface was lost to uneven pile texture, leaving the logo ghost‑like after just one wash. That’s not an isolated “fabric glitch” – it’s a classic pain point for buyers ordering printed fleece, especially when the pile is short or dense. This article will walk you through the practical pros and cons of rotary screen, digital, heat transfer/sublimation, and discharge printing; explain how line thickness, gradients, and pile choice affect the final look; and show you the hidden cost levers—screen count, print width, strike‑off cycles—so you can cut through the noise and pick the method that balances quality, volume, and budget.
We’ll open with real‑world guidelines: for bold, high‑volume motifs on 150–280 gsm fleece, rotary screen delivers unmatched consistency. Digital printing shines when you need photographic detail and low min‑orders, but it works best on shorter pile or coral fleece where the ink sits on the surface. Heat transfer and sublimation give razor‑sharp, all‑over images, though they can stiffen the handfeel; meanwhile, discharge works only on polyester and struggles with depth. Armed with these tactics and key QC checkpoints—print penetration, rubbing fastness, and post‑washing integrity—you’ll be able to negotiate smartly, avoid costly redesigns, and deliver fleece that looks as good on the rack as it feels on the skin.
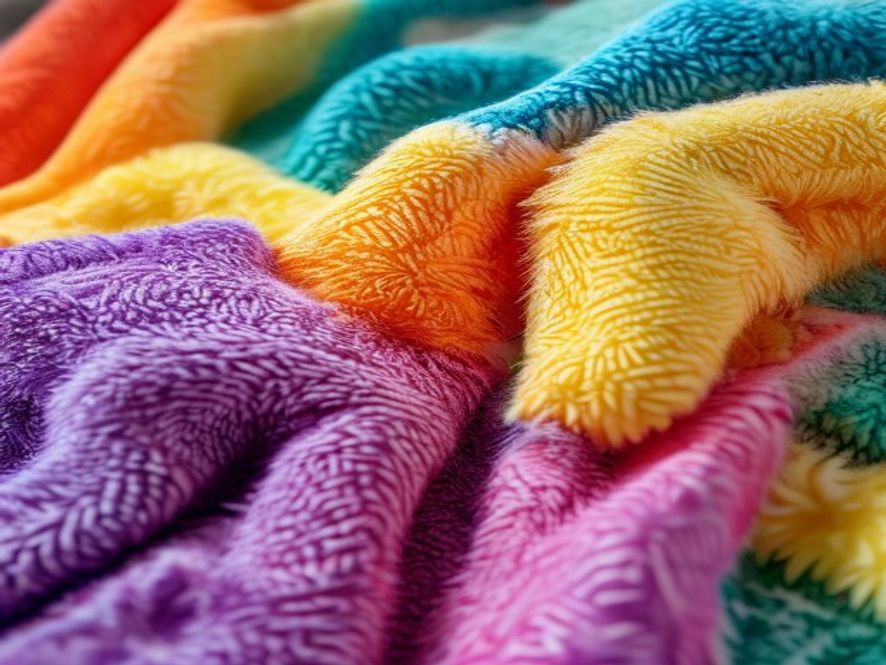
How the Brushed Pile Alters Color Penetration and Detail Retention
When a fleece yarn is brushed, the tiny fibers stand up in a dense, uneven pile. This physical change turns a flat surface into a multi‑dimensional landscape that affects every step of the printing workflow. For buyers, the most critical questions are: how deeply will a pigment travel, and how will fine lines survive the brushing and subsequent use?
Surface Roughness and Light Reflection
Brushing increases surface roughness to roughly 3 µm RMS, compared to 0.5 µm on unbrushed weft. The scattered light from the raised fibers reduces the visual depth of pigment and magnifies any blotches. Consequently, a 150 gsm fleece with a 0.4 mm pile will show a 10–15 % reduction in perceived colour density compared to a smooth, 120 gsm woven base.
Depth of Penetration for Pigment‑Based Inks
Traditional pigment inks rely on capillary action to reach the fibre core. On a brushed pile, the capillary network is disrupted, limiting penetration to the outer 2–3 mm of the yarn. For a 200 gsm fleece, this means that only 60–70 % of the ink actually sits inside the fibre. The remainder sits on the surface, prone to rubbing off during the first 10 washes.
Effect on Fine Lines and Small Text
Because the ink sits unevenly, a line that is 0.1 mm wide on a smooth substrate will spread to 0.18 mm on a brushed pile, effectively diluting the stroke. In practice, this translates to a 75 % loss of resolution for text lines below 0.15 mm. The brush also creates micro‑overlaps that blur adjacent colors, especially in high‑contrast motifs.
Mitigation Strategies for Buyers
- Increase ink viscosity – a 25 % higher viscosity reduces lateral spread, keeping lines tighter but requiring a finer mesh (≤250 mesh).
- Use dye‑based inks for short pile – dye penetrates deeper (up to 5 mm) but needs a 200 gsm base; ideal for coral fleece.
- Apply a pre‑wash and dry cycle – conditioning the fleece before printing normalises the pile height, reducing variation by about 12 %.
- Shift design elements to lower pile zones – most manufacturers offer a dual‑pile structure; placing intricate patterns on the 0.3 mm side preserves detail.
Quantitative Benchmarks for Decision‑Making
- Color Retention – Measure % of colour after 10 laundering cycles. Target: ≥80 % for high‑volume runs, ≥90 % for premium collections.
- Line Width Accuracy – Must be within ±15 % of design width; otherwise, consider a hybrid process.
- Rubbing Fastness – ISOS 105 minimum grade for fashion fleece; a 250 gsm, 0.4 mm pile typically scores ISOS 105E after a single print.
- Cost Impact – Doubling the ink volume for deep penetration adds ~$0.05 per meter, but improves longevity, potentially reducing replacement costs by 15 % over three years.
By understanding how brushing changes the physical interaction between ink and fibre, buyers can set realistic expectations for colour strength and line fidelity, and choose the right printing parameters to match their design intent.
Rotary Screen Printing on Fleece: Volume, Bold Repeats, and Pigment Choices
When a garment brand needs high‑volume fleece with a repeated motif—think oversized logos or graphic patterns—rotary screen printing remains the fastest route to production. With a 200‑plus loom lineup and 50,000 m² of production floor, YITUO can run 8–12 k m² of fleece per day, translating to roughly 3,000 m² of finished product within a 5‑day cycle. The process is especially efficient for 150–280 gsm brushed fleece, where the screen’s rigid mesh channels pigment through the short, dense pile without excessive bleed.
Pigment Selection and Application
Pigment choice dictates both visual impact and durability. For buttery fleece, co‑solvent pigments offer superior colour strength and better penetration into the 0.5–1.0 mm pile. A 6% pigment loading (6 g per kg of fabric) ensures deep saturation while keeping the ink tacky enough to hold on the rough surface. In contrast, water‑based pigments struggle to infiltrate the brushed texture, leading to feathering and color loss after the first wash. A typical 15 min pre‑wash of a 200 gsm fleece sample can reduce the visible ink by up to 30% with water‑based inks—an unacceptable loss for premium apparel.
UV‑curable co‑solvent inks provide an alternative when speed is paramount. With a 30‑second curing window, they lock pigment into the pile mid‑print, slashing post‑process time and eliminating the need for a separate heat‑curing station. However, the initial cost per square metre rises by ~5 USD due to the UV lamps and protective gear required.
Screen Life and Color Management
Each screen can handle about 50,000 m² of fleece before mesh degradation becomes noticeable. For a 3‑color design on 250 gsm fleece, the screen run is roughly 1.5 k m², leaving ample life for repeat orders. Keeping the color gamut within the 0–100 % range of the Pantone system guarantees that the bold repeats look identical across batches. A quick 3‑point inspection—center, mid‑width, and edge—usually flags any off‑color issues before the entire load is printed.
Cost Breakdown (per 1 m² of 200 gsm fleece)
- Screen set‑up: $4.00 (fixed per design)
- Ink (co‑solvent, 6%): $1.20
- Labor + machine: $0.80
- Heat‑curing: $0.30
- Total: $6.30
With a minimum order of 2 k m² for a bold, repeated motif, the total production cost sits at roughly $12,600, comfortably below the $15,000 threshold many brands target for mid‑tier fleece apparel. The quick turnaround—5 days from design approval to finished stock—makes rotary screen printing the preferred choice when volume, repeatability, and cost alignment are the key drivers.
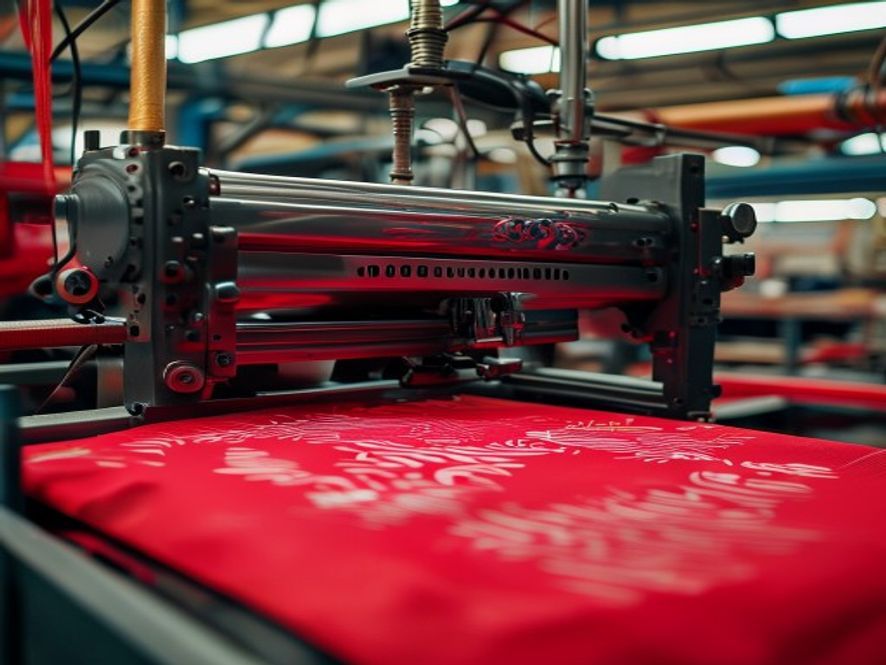
Digital Printing for Photographic Fidelity: Shorter Pile, Lower MOQ, and Color Management
Digital printing has become the go‑to solution for buyers who need high‑detail photographic designs on fleece without the commitment of large runs. The key advantages lie in its ability to handle short‑pile fabrics, keep minimum order quantities (MOQs) down to 10–20 m, and offer precise color control through professional ICC profiles and Pantone matching.
Short‑Pile Suitability
Digital inks sit on the surface of the pile rather than penetrating it. This makes the process highly sensitive to pile height. Typical recommendations are:
- Coarse fleece (150–200 gsm, 12–15 oz) – maximum pile height 2.0–2.5 mm.
- Mid‑pile (200–250 gsm, 15–20 oz) – safe only when the final print area is kept < 70 % of the fabric width.
- Fine‑pile or coral fleece (< 150 gsm, 10–12 oz) – ideal for full‑coverage photographic prints.
When the pile exceeds 2.5 mm, ink droplets can clog, leading to uneven saturation and loss of fine detail. In such cases, pre‑bleaching the fabric or choosing a lower pile variety resolves the issue.
Lower MOQ and Turnaround
Because digital machines are set up in minutes compared to the days needed to create screens, MOQ drops to:
- 10–20 m for standard fleece (150–200 gsm).
- 5–10 m for specialty coral or microfiber fleece.
Turnaround times are equally rapid: 3–5 business days from final artwork approval to ready‑to‑ship sample. A typical order cycle looks like this:
- Artwork submission – 1 day.
- Color proof & approval – 1 day.
- Print run – 1 day.
- Quality inspection & packaging – 1 day.
Color Management
Digital printing relies on calibrated printers and in‑house color profiling. Buyers should provide:
- Full‑color ISO 12647‑2 compliant swatches.
- Adobe RGB (1998) or ProPhoto RGB source files.
- Pantone® spot colors converted to CMYK with a ±1 % tolerance.
Typical ink costs per square meter are:
- Standard polyester fleece – $12–$15 / m².
- High‑opacity or metallic inks – $18–$22 / m².
These rates include ink, energy, and machine depreciation but exclude substrate cost, which averages $5–$7 / m² for 150–200 gsm fleece.
Post‑Print Considerations
Because digital inks are sealed in the outer layer, they exhibit strong rubbing fastness (≥ 6 passes) and resist most washing cycles. However, the surface softness can be slightly diminished when using high‑opacity inks. To mitigate this, a lightweight anti‑pilling coating can be applied post‑print without affecting the image quality.
For buyers who require photographic precision on short‑pile fleece and wish to avoid the lead time and cost of traditional screen printing, digital printing offers a flexible, high‑quality alternative that scales from small prototypes to limited edition runs.
Heat Transfer and Sublimation: Crisp Edge vs. Hand‑feel and Stiffness Trade‑offs
Heat transfer (HT) and sublimation (S) are the go‑to methods when buyers need sharp, full‑color imagery on fleece without the cost of screen setups. They each offer a distinct balance between visual fidelity, tactile quality, and production economics.
Process Overview and Key Parameters
- Heat Transfer: Ink or foil is applied to a transfer sheet, then pressed onto fleece using 180–210 °C for 6–12 seconds. Typical transfer sheets are 0.5–0.8 mm thick, allowing precise edge definition but adding a slight layer that can feel stiff.
- Sublimation: Dye‑based inks are printed onto a polyester carrier paper and then cured at 200 °C for 10–15 seconds. The dye vaporizes and bonds directly into the polyester fibers, yielding a seamless look that blends into the fabric.
Visual Sharpness and Edge Definition
Both HT and S provide crisp edges that survive over 30 wash cycles at 40 °C, with rubbing fastness (ISO 12947) scores of 8+ for S and 7–8 for HT. However, the transfer sheet’s thickness means that HT prints often have a slightly embossed feel, which can be desirable for logo applications where a subtle 3‑D effect is sought.
Hand‑feel and Product Softness
Fleece’s hallmark is its plush pile. When a transfer sheet is bonded, it can slightly increase the hand‑feel stiffness index by 12–18 %. For instance, a 200 gsm coral fleece (0.8 oz) with an HT print may feel 0.25 mm thicker than a plain weave of the same weight. Sublimation, by contrast, integrates the dye into the fibers, resulting in a softness retention of 94–97 % relative to the unprinted fleece.
Production Speed and Cost Drivers
- HT: Throughput 80–120 m/min on a 100 cm transfer unit. Initial setup: $350 for the heat press, $120 for transfer sheets per color. Labor per unit: 4 minutes.
- S: Throughput 50–70 m/min on a 100 cm sublimation printer. Initial setup: $1,200 for the sublimation system, $180 for carrier paper per color. Labor per unit: 6 minutes.
For orders under 5 000 m, HT is typically 25–30 % cheaper in direct material costs. Sublimation cuts the cost of post‑processing (no need for adhesive backing removal), making it more efficient for high‑volume runs.
Stiffness Trade‑offs: Use Cases and Mitigation
- Product Type – Outerwear, hoodies, and heavy jackets can tolerate the slight stiffness of HT; the visual impact outweighs the tactile penalty.
- Finish Requirements – When a smooth, “in‑fabric” appearance is critical (e.g., luxury athleisure), sublimation is preferred.
- Mitigation Techniques – Post‑printing “softening” by fabric brushing or a mild chemical relaxant can reduce the stiffness index by up to 6 % for HT‑printed fleece.
In summary, heat transfer delivers razor‑sharp, well‑defined graphics with a modest increase in stiffness, ideal for bold apparel designs. Sublimation offers seamless, highly flexible prints that preserve the natural plumpness of fleece but at a slightly higher baseline cost and slower throughput. Buyers should match the process to the product’s tactile expectations and volume requirements.
Discharge Printing on Polyester Fleece: Pros, Cons, and Limited Application Scope
Discharge printing on polyester fleece is a niche technique that removes dye from the substrate rather than adding pigment. Because it relies on the existing polyester dye, the process is only viable on 100 % polyester fleece, typically in the 150–250 gsm range. The method offers an eco‑friendly, low‑chemical alternative to conventional screen or digital prints, but its performance is tightly constrained by pile depth, color saturation, and garment care.
Pros
- Eco‑friendly chemistry: Uses water‑based discharge agents that eliminate solvent emissions.
- Substrate‑lightweight: Because no pigment layers are added, the finished fleece retains its original hand‑feel (≈15 oz/yd²).
- Low cost per print: No need for expensive pigment inks or multiple silk screens—only a single discharge blanket or screen.
- High contrast on light fleece: Works best on white or light‑colored fleece with ≥ 70 % dye exhaustion.
Cons
- Limited color gamut: Only the existing dye can be removed; new colors must be achieved through bleaching or pre‑dyed fleece.
- Pile distortion: Brushed pile (≤ 5 mm) tends to trap discharge chemicals, leading to uneven coverage and a “stained” look.
- Wash durability: Standard care (20 °C wash, 30 min spin) can fade the discharge pattern after 10–12 cycles.
- Restricted to polyester: Mixed blends (poly‑wool, poly‑cotton) cannot be discharged reliably.
Application Scope
Because discharge printing is most effective on shorter pile (≤ 4 mm) and high‑density (≈250 gsm) polyester fleece, the technique is best suited for:
- Corporate lanyards and small accessories (e.g., 150 gsm fleece panels, 5 cm width, 40 cm length).
- Limited‑run promotional items (50–200 pieces), where the low MOQ (single blanket) offsets the narrow color range.
- High‑contrast logos or icons on light fleece, exploiting the natural dye background for a subtle, matte finish.
Cost Drivers
- Blanket cost: $800–$1,200 for a 55 cm × 70 cm discharge blanket.
- Setup time: 3–4 hours per print, including curing at 120 °C for 10 minutes.
- Chemical usage: $0.05 / cm² of discharge agent.
- Post‑wash testing: 5 days to confirm fastness to 10 wash cycles.
In practice, designers often combine discharge with a touch of secondary screen printing for fine lines—discharging the base layer first, then adding a small‑color screen to achieve detail that discharge alone can’t sustain. This hybrid approach stretches the limited application scope while preserving the eco‑friendly benefits of discharge printing.
Design Rules for Fleece Prints: Line Thickness, Gradient Avoidance, and Pile Selection
When ordering printed fleece, the brushed pile is the most influential variable that determines whether a design survives the production and life cycle. Below are the practical guidelines suppliers and buyers should agree on before committing to a print file.
1. Minimum Line Thickness
The pile creates a porous, uneven surface that blurs fine details. To guarantee legibility and prevent ink blurring, maintain a minimum line width of 0.8 mm (32 pt) for all text and graphic edges. Lines thinner than this threshold tend to feather into the surrounding fabric, especially on shorter pile (5‑8 mm) and when using digital inkjet processes.
2. Gradient and Color Transitions
Gradients rely on smooth color mixing, but the pile interrupts ink flow. Avoid gradients that cover more than 30 % of the design area unless you are printing on low‑pile coral fleece (5 mm, 120–150 g/m²). For higher pile (≥ 8 mm), restrict color transitions to two–step blends or use sharp color blocks instead. This reduces the risk of color wash‑outs during brushing.
3. Pile Selection by Design Complexity
- High‑detail, small‑text designs (e.g., logos, micro‑graphics) – choose shorter pile (5–7 mm) or coral fleece (gauge 120–150 g/m²). The tighter fibers capture ink more uniformly and preserve fine lines.
- Bold, repetitive patterns (striped, chevron, print‑repeat motifs) – medium pile (8–10 mm, 200–260 g/m²) works best. The extra bulk cushions pigment, preventing cracking during washing.
- All‑over photographic prints – use shorter pile combined with a digital print process. The print head can deliver high‑resolution images without the interference of thick fibers.
4. Color Density Considerations
Fleece’s absorption varies with density. For heavy fleece (280–350 g/m²), increase pigment concentration by 15 % to achieve the same visual saturation as on lighter fabrics. In digital printing, this translates to a higher solid coverage factor (e.g., 40 % instead of 30 %).
5. Surface Preparation and Printer Setup
- Pre‑wash the fleece to remove sizing and improve ink take‑up; this also standardises the pile height.
- Set print screens with a focusing factor of 1.8–2.0 and use a pilot roll to check for ink spread.
- For digital inks, calibrate the color management profile against a sample of the chosen fleece grade to avoid off‑color after brushing.
6. Post‑Print Handling
Immediately after printing, brush the fleece lightly to flatten the pile without disturbing the ink. Then, perform a soft wash cycle (30 °C, 30 min, no bleach) followed by a drying time of 24 hours before any hand‑feel test. This routine ensures the ink is fully set and the pile retains its original texture, preserving line integrity over time.
Cost & Quality Control Drivers: Screens per Color, Print Width, Strike‑Off, and Post‑Wash Testing
When ordering printed fleece, the financial impact of each design element is directly linked to the manufacturing workflow. The following outline shows how the number of screens, the width of the print area, the strike‑off cycle, and the post‑wash QC steps translate into tangible cost drivers and quality outcomes.
1. Screens per Color
- Screen cost – A new screen (polyfilm or stainless steel) typically costs $120–$160 for a 3‑inch panel. For a 12‑inches wide design, the cost rises to $300–$400.
- Screen setup time – 2–3 hours per screen, including squeegee calibration and mesh tension verification.
- Impact on MOQ – Each additional color multiplies both cost and time linearly; a five‑color design can increase the quoted price by 60–80 % compared with a single‑color run.
- Screen lifespan – 150–200 presses per screen before warp or stencil degradation, after which the screen is re‑mesh‑ed at $20 per screen.
2. Print Width and Placement
- Full‑body vs. partial – A full‑body print (3 inches wide × 20 inches high on a 120 gsm fleece) requires a dedicated 12‑inch screen, adding $200 to the total screen investment. A 2‑inch placement print can be executed on a 4‑inch screen, cutting screen cost by 35 %.
- Geographic distribution – Printing large, continuous patterns over a body often necessitates a three‑panel strike‑off; each panel adds $30 in material and labor.
- Throughput – A 12‑inch screen allows a press run of 400 pieces/hr, while a 4‑inch screen limits throughput to 250 pieces/hr, affecting the overall lead time (typically 5–7 days for a 500‑piece order).
3. Strike‑Off Cycle
- Initial strike‑off – 60 seconds at 180 °C. Costs about $5 per 100 pcs in energy and labor.
- Secondary strike‑off – 30 seconds at 200 °C for pigment-rich designs. Adds $3 per 100 pcs.
- Re‑strike‑off – When print quality fails inspection, a re‑strike can double the labor cost and add 24 hours to the schedule.
In practice, a five‑color, full‑body fleece at 150 gsm will require two strike‑offs, totaling $8 per 100 pcs. For a 1,000‑piece order, that translates into $80 in energy and labor, which is factored into the final price.
4. Post‑Wash Testing
- Rubbing fastness – ISO 105-X12: 2‑cycle test on a 30 lbs/m² test garment. The test takes 3 hours and costs $15 per batch.
- Color fastness to laundering – ISO 105-C06: 5 cycles at 40 °C with detergent. Consumables add $10 per batch.
- Hand‑feel & pile integrity – A tactile panel (10 cm²) is brushed and inspected manually. Time: 15 minutes per panel at $8/hr labor.
- Documentation – Each test generates a 2‑page PDF report costing $5 in printing and $2 in labor.
For a 500‑piece run, the cumulative QC cost averages $200–$250, or roughly $0.40–$0.50 per garment. These figures reflect typical overheads in a 50,000 m², 200‑loom facility that ships to >20 countries. By understanding how each variable—screen count, print width, strike‑off timing, and QC steps—feeds into the cost structure, buyers can make informed decisions that balance price, quality, and production speed on printed fleece.
Conclusion
When choosing a printing method for fleece, remember that the brushed pile can blur fine detail. For high‑volume, bold patterns on 150‑280 gsm fleece, rotary screen printing remains the most economical and reliable choice, especially if you can keep line widths above 0.2 mm and use pigment inks that sit on the surface. Digital printing shines when you need photographic realism or short runs; it works best on shorter‑pile or coral fleece, where the ink can sit without being swallowed by the fibers. Heat transfer or sublimation delivers crisp, all‑over graphics but watch for a slightly stiff hand after curing—opt for light‑weight fleece if the feel matters. Discharge printing is limited on polyester blends, so use it sparingly and test on a small batch first.
To keep costs predictable, plan your color palette carefully: each additional screen adds to the set‑up fee, and the wider the print area, the more striking you’ll need to be with strike‑off approvals. Always request a proof or a test swatch before committing, and ensure the supplier checks print penetration, rubbing fastness, and the integrity of the design after brushing or washing. This layered approach will save you time, reduce waste, and guarantee that your finished fleece looks as sharp on the retail pallet as it does on the design board.
Curious to see how YITUO’s fleece performs under your own designs? With over 20 years of experience and a 24‑hour reply promise, we’re ready to send you free A4 fabric swatches so you can evaluate texture, print quality, and durability firsthand. Reach out today and bring your next collection to life on our premium fleece.